
Most people who join a gym share a common goal: to lose weight and feel better in their own skin. Whether it’s to boost confidence, improve health, or simply enjoy life without feeling restricted or guilty, fat loss is a personal journey — and one that can be empowered by the right training and nutrition.
In this article, we’ll cover the most effective exercises for weight loss, why compound movements are superior for fat loss, and why your nutrition strategy will always make or break your results.
Why Exercise Alone Isn’t Enough for Weight Loss
Before diving into workouts, it’s important to make one thing clear: exercise doesn’t cause fat loss — a calorie deficit does.
To lose weight, your body must be in a state where it burns more energy than it consumes. This is called a caloric deficit, and it’s created through a combination of:
-
Calorie expenditure (exercise, NEAT, and metabolic function)
-
Calorie intake (nutrition, food choices, portion control)
You can train hard 6 days a week, but if your diet is unstructured or too high in calories, weight loss will stall — or never happen at all.
Nutrition for Weight Loss: The Non-Negotiable Factor
You Can’t Out-Train a Poor Diet
Exercise contributes to only 10–30% of your total daily calorie burn, while nutrition controls 100% of what you put into your body. That’s why focusing on food quality, portion control, and macronutrient balance is key.
“Energy balance is the primary determinant of body fat changes. Physical activity helps, but weight loss is achieved primarily through dietary control.”
— Hall et al., 2012, Obesity Reviews
What a Fat-Loss Focused Diet Looks Like
-
Sufficient protein intake (~0.8–1g per lb of body weight)
-
Moderate carbohydrates to fuel training and support energy
-
Healthy fats to support hormones and satiety
-
Caloric deficit of ~250–500 calories/day for sustainable fat loss
-
Plenty of water, vegetables, and fiber
If you're confused about where to start or what your targets should be, work with a professional. A certified coach can remove the guesswork and help you develop a plan that works with your body and your lifestyle.
Need a coach? The Swole Kitchen offers custom plans with macro targets, meal ideas, and real support from a human — not a template.
The Power of Compound Movements
Compound exercises are resistance training movements that require multiple muscle groups to work together, engaging several joints during each repetition. Because these exercises stimulate a larger amount of muscle mass simultaneously, they result in a higher caloric expenditure compared to isolation movements. This increased energy burn not only helps you lose weight but also builds lean muscle, which in turn boosts your resting metabolic rate.
Why Compound Exercises Are Ideal for Fat Loss
-
Maximized Caloric Burn:
Movements such as barbell squats, deadlifts, push presses, and kettlebell swings engage large muscle groups like the quadriceps, glutes, and back. By recruiting more fibers, your body works harder to lift the weight, burning more calories in the process. -
Increased Muscle Recruitment:
Compound exercises force your body to work as an integrated system. For instance, a deadlift not only works your hamstrings and glutes but also demands significant activation of your core and upper back muscles. This type of full-body engagement means you’re constantly challenging your body to adapt, leading to improvements in both strength and endurance. -
Functional Strength and Performance:
Because compound movements mimic real-life actions—squatting down to pick something up or pushing something heavy—these exercises improve functional strength, stability, and balance. This functional strength becomes especially important as you lose weight, helping protect your joints and reducing the risk of injury. -
Hormonal Benefits:
Engaging multiple muscle groups can lead to an increased release of anabolic hormones like testosterone and growth hormone. These hormones aid in muscle repair and fat loss, further enhancing your body’s ability to transform.
“Compound exercises are effective for building strength and muscle because they involve large muscle groups and promote the release of anabolic hormones that help in overall body composition improvement.”
Why They Burn More Fat
Compound lifts activate large muscle groups (legs, back, chest) and often involve the core and stabilizers. This means your heart rate stays elevated, your nervous system is engaged, and your calorie burn increases — both during the workout and after.
“Compound resistance exercises elicit greater energy expenditure and post-exercise oxygen consumption compared to single-joint movements.”
— Paoli et al., 2012, Journal of Strength and Conditioning Research
Metabolic Benefits of Compound Lifting
-
Increased muscle mass → Higher resting metabolic rate
-
Greater hormonal response → Boost in growth hormone and testosterone
-
Higher calorie burn per rep → Greater workout efficiency
-
EPOC effect → Elevated calorie burn for 24–48 hours post-workout
In short: if your goal is to get lean and stay strong, compound movements are a smarter investment than endless cardio or high-rep isolation work.
How to Structure Your Fat Loss Training
Sample Weekly Schedule
| Day | Focus |
|---|---|
| Monday | Lower body compound (squats, RDLs) + core |
| Tuesday | Upper body pull (rows, pull-ups) + arms |
| Wednesday | Active recovery or cardio |
| Thursday | Full-body circuit (deadlifts, presses, lunges) |
| Friday | Upper body push (bench, overhead press) + core |
| Saturday | Conditioning or HIIT |
| Sunday | Rest or mobility work |
Include progressive overload, prioritize form, and pair training with structured macronutrient intake for best results.
If you want to lose weight, build muscle, and feel more confident in your body, you need a sustainable plan built around compound strength training, a high-protein diet, and a small calorie deficit.
Fad diets and fat burners might promise quick results, but the truth is this: consistency with the basics always wins.
Don’t guess. Don’t starve. Don’t go at it alone.
Work with a certified coach from The Swole Kitchen to get a personalized strategy that fits your goals, food preferences, and schedule — and finally see the results you’ve been working for.
The 8 Best Exercises For Weight Loss
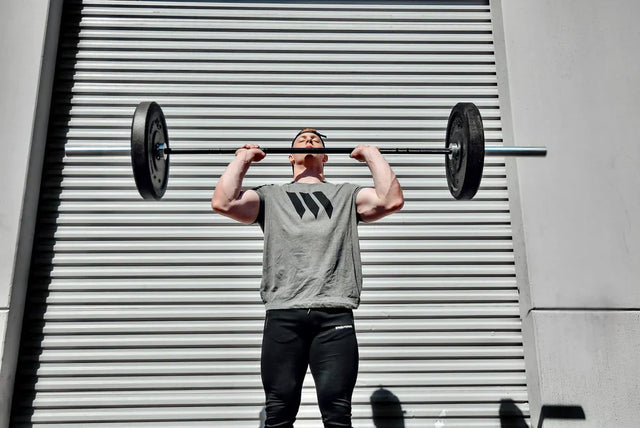
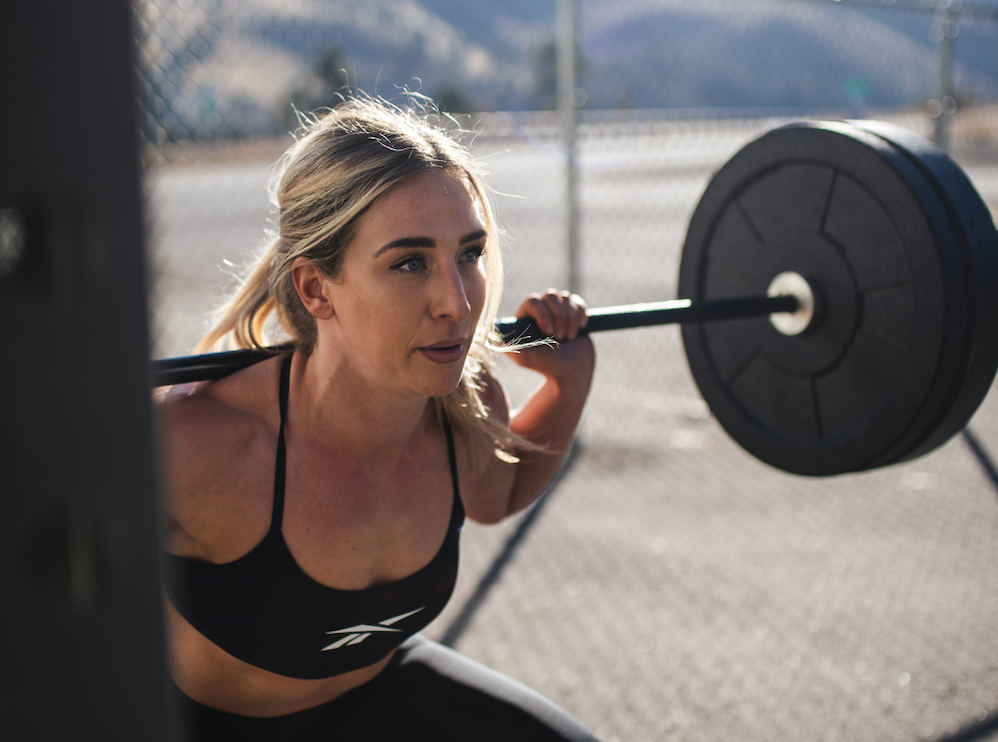
1. Barbell Back Squat
Squats like the deadlift are a lower body compound strength training movement. Traditionally performed with a barbell, placed behind your neck, the squat has several alternatives and variations that can be used in place of the barbell back squat to stimulate and contract the muscles in the posterior chain, such as quadriceps, gluteus maximus, and hamstrings. You can use kettlebells, dumbbells, you can goblet squat, landmine squat, front squats , and even pistol squat if you don’t want to use the barbell. Whatever variation you use, squats are extremely effective for weight loss, and building strength.
How To Squat
How to Do a Barbell Back Squat: Form, Setup, and Tips for Strength and Growth
The barbell back squat is one of the most effective compound movements for building lower-body strength, muscle mass, and improving overall athletic performance. It primarily targets the quadriceps, glutes, and hamstrings, while also engaging the core and lower back for stabilization.
When performed with proper technique, the barbell back squat is a staple exercise that supports strength development, functional movement, and long-term joint health.
Step-by-Step: How to Perform a Barbell Back Squat
1. Set Up the Bar
-
Use a squat rack or power rack.
-
Position the barbell at about chest height (just below shoulder level).
-
Load the desired weight and secure it with collars.
2. Bar Position & Grip
-
Step under the bar and rest it across your upper traps (high-bar squat) or across your rear delts (low-bar squat).
-
Grip the bar just outside shoulder width, keeping your elbows pointing down and back.
-
Brace your upper back and squeeze your shoulder blades together.
3. Unrack the Bar
-
Take a deep breath, stand tall, and lift the bar off the rack by driving through your legs.
-
Take 1–2 steps back, set your feet shoulder-width apart or slightly wider with toes slightly pointed out.
4. Squat Down (The Descent)
-
Take a deep breath and brace your core.
-
Begin the movement by pushing your hips back and bending your knees simultaneously.
-
Keep your chest up, back flat, and knees tracking over your toes.
-
Squat until your thighs are at least parallel to the floor, or lower if your mobility allows.
5. Drive Up (The Ascent)
-
Push through your midfoot and heels to rise back up.
-
Keep your spine neutral and chest lifted as you extend your hips and knees together.
-
Exhale as you reach the top and reset your breath before the next rep.
Key Technique Tips
-
Foot Position: Shoulder-width apart with a slight toe flare is standard. Adjust slightly based on your anatomy and mobility.
-
Knee Tracking: Knees should move in line with your toes—not caving in or flaring too far out.
-
Depth: Go as low as you can while maintaining a neutral spine. Ideally, aim for thighs parallel or slightly below.
-
Core Engagement: Brace your abs before every rep to support your spine.
-
Breathing: Inhale deeply before lowering, exhale as you drive up from the bottom of the squat.
Common Mistakes to Avoid
-
Letting your knees collapse inward
-
Rounding your lower back at the bottom
-
Heels lifting off the floor
-
Not going low enough to stimulate full muscle recruitment
-
Uncontrolled descent or bounce at the bottom
Muscles Worked
-
Primary: Quadriceps, gluteus maximus, hamstrings
-
Secondary: Core, spinal erectors, adductors, calves
Programming Recommendations
-
For strength: 4–6 sets of 3–6 reps at 75–90% of your 1RM
-
For hypertrophy: 3–4 sets of 8–12 reps at moderate weight
-
For endurance/general fitness: 3 sets of 12–15 reps at lighter load with good form
2. Deadlift
Deadlifts have many known full body benefits and are extremely crucial in the development of total-body strength, proper hip function, core strength, and spine stabilization (which can reduce the risk of lower back injuries). Since deadlifts recruit multiple muscle groups, joints, and stabilizing muscles, they also burn more calories and more body fat as compared to other exercise movements. With the proper form, the deadlift can add a ton of performance and health benefits, to your training program, not to mention help with weight loss.
How To Deadlift
How to Deadlift: Build Total-Body Strength With Proper Form and Technique
The deadlift is one of the most fundamental compound lifts in strength training. It’s a full-body movement that primarily targets the posterior chain — including your glutes, hamstrings, lower back, and core — while also engaging the upper back, traps, and grip.
Whether you're an athlete, lifter, or someone simply looking to move better and build real-world strength, mastering the deadlift can help you improve performance, body composition, and injury resilience.
Step-by-Step: How to Perform the Barbell Deadlift
1. Set Up Your Stance
-
Stand with feet hip-width apart.
-
Toes should point forward or slightly out, with the barbell positioned over your midfoot (approximately one inch from your shins).
-
Keep your spine neutral and shoulders over the bar.
2. Grip the Bar
-
Bend at the hips and knees to lower down and grab the bar just outside your knees.
-
Use a double overhand grip to start; you can switch to a mixed grip (one overhand, one underhand) for heavier loads.
-
Engage your lats by pulling your shoulder blades slightly back and down.
3. Set Your Back and Brace
-
Flatten your back and engage your core by taking a deep belly breath and bracing your abs.
-
Your chest should be up, eyes forward or slightly down, and hips just above your knees.
-
Arms should hang straight and vertical.
4. Lift the Bar (The Pull)
-
Push through the floor with your legs, extend your knees and hips together, and keep the barbell close to your body.
-
Avoid jerking the weight — the bar should rise in a smooth line.
-
As the bar passes your knees, drive your hips forward and squeeze your glutes to lock out at the top.
5. Return to Start (The Descent)
-
Reverse the movement by hinging at the hips first, then bending the knees after the bar clears them.
-
Keep the bar close to your legs throughout the descent.
-
Touch the floor with control, pause, and reset for your next rep.
Muscles Worked in the Deadlift
-
Primary: Gluteus maximus, hamstrings, erector spinae, quadriceps
-
Secondary: Core, upper traps, lats, rhomboids, forearms, grip muscles
Key Form Cues
-
Barbell should travel in a straight vertical path from floor to lockout.
-
Keep your back flat and tight — never round your spine.
-
Engage your lats by thinking about “bending the bar” or “tucking your armpits in.”
-
Brace before every rep as if preparing to take a punch to the stomach.
Common Mistakes to Avoid
-
Rounding the lower back during the pull
-
Letting the bar drift away from your legs
-
Starting with hips too low or too high
-
Pulling with the arms instead of driving through the legs
-
Rushing the setup or descent
Programming Guidelines
For Strength
-
4–6 sets of 3–6 reps
-
Rest 2–3 minutes between sets
-
Load: 80–90% of your 1-rep max (1RM)
For Hypertrophy (Muscle Growth)
-
3–4 sets of 8–10 reps
-
Rest 60–90 seconds
-
Moderate weight, controlled tempo
For Endurance/Conditioning
-
2–3 sets of 12–15 reps
-
Light to moderate weight
-
Focus on form under fatigue
Benefits of the Deadlift
-
Builds total-body strength and lean muscle
-
Improves posture and hip hinge mechanics
-
Boosts athletic performance (jumping, sprinting, carrying)
-
Enhances grip and core stability
-
Supports metabolic conditioning when used in high-volume sets
“The deadlift recruits more muscle mass than nearly any other movement and is foundational for both strength development and functional movement.”
— Escamilla et al., Journal of Strength and Conditioning Research
Start light, perfect your form, and build confidence before increasing load. The deadlift is a technical, high-reward movement that can unlock new levels of strength and body composition if trained with intent and precision.
Ready to take your training further? Support your recovery and muscle growth with:
Swolverine POST – for faster recovery and reduced soreness
Swolverine Creatine Monohydrate – to build strength and power
The Swole Kitchen Nutrition Coaching – for personalized nutrition plans that support your goals
3. Burpees
Burpees are a full body, aerobic body weight movement. Burpees are a hybrid plymetric exercise, that essentially combines a push up with a jump. Simply jump back into push up position, kiss the ground, with your chest down to the floor, snapping your feet back underneath you and jumping up. It’s that simple, a hybrid and full body push up/jumping jack all in one, which by the way, is amazing for weight loss, as it utilizes all the muscles in your body.
How to Do Burpees: Burn Fat, Build Endurance, and Boost Athletic Conditioning
The burpee is a high-intensity, full-body exercise that combines strength, cardiovascular conditioning, and explosive power. Loved by athletes and dreaded by many, burpees are one of the most effective bodyweight movements for improving endurance, burning calories, and building mental toughness.
Whether you’re training for weight loss, athletic performance, or general fitness, incorporating burpees into your workout can take your conditioning to the next level.
How to Perform a Standard Burpee
Step-by-Step Instructions:
-
Start in a Standing Position
Stand tall with your feet shoulder-width apart, arms at your sides. -
Drop into a Squat
Lower your body into a squat position and place your hands on the floor in front of you. -
Kick Back into a Plank
Jump or step both feet back so you're in a high plank position, keeping your core tight and back flat. -
Perform a Push-Up (Optional)
Lower your chest to the ground, then press back up to a plank position. This adds a strength component to the movement. -
Jump Feet Forward
Explosively jump your feet back to your hands, returning to a low squat position. -
Jump and Reach Overhead
From the squat, jump vertically into the air while extending your arms overhead. Land softly and immediately begin your next rep.
Muscles Worked
-
Primary: Quadriceps, glutes, hamstrings, chest, shoulders, triceps, calves
-
Secondary: Core, hip flexors, lower back
Benefits of Burpees
1. High Caloric Burn
Burpees elevate your heart rate rapidly and burn more calories than many isolated strength or cardio movements. They're especially effective for fat loss when performed in high-rep sets or circuits.
“High-intensity bodyweight exercises like burpees significantly increase energy expenditure, making them useful for weight management and metabolic conditioning.”
— Kravitz et al., IDEA Health & Fitness Association
2. Improves Cardiovascular Endurance
Burpees challenge both the aerobic and anaerobic systems, making them ideal for boosting conditioning and stamina in a short amount of time.
3. Enhances Full-Body Strength and Coordination
With components of a squat, push-up, and jump, burpees train your entire body while improving movement efficiency, power, and core control.
4. No Equipment Required
Burpees can be done anytime, anywhere, making them perfect for travel, home workouts, or bodyweight conditioning sessions.
Common Burpee Mistakes
-
Letting your hips sag in the plank
→ Engage your core to protect your lower back. -
Skipping the jump or rushing the push-up
→ Perform each rep with intent and full range of motion. -
Landing hard on your feet or knees
→ Focus on soft, athletic landings to reduce joint stress. -
Collapsing your chest during the push-up
→ Keep your elbows tucked and move through controlled reps.
Programming Recommendations
For Conditioning
-
3–5 sets of 10–15 reps
-
Use in a circuit or as a finisher at the end of your workout.
For Fat Loss or HIIT
-
Tabata style (20s work / 10s rest x 8 rounds)
-
Every Minute on the Minute (EMOM): 10 burpees at the top of every minute for 10–15 minutes
For Challenge Sets
-
100 burpees for time – a classic fitness benchmark
-
Pair with jump squats, mountain climbers, or kettlebell swings for total-body intensity
Burpee Variations
-
Half Burpee (no push-up or jump)
-
Burpee with Tuck Jump
-
Burpee to Box Jump
-
Dumbbell or Weighted Burpee
-
Lateral Burpee (jump over object)
Burpees are one of the most efficient exercises for building cardio capacity, strength, explosiveness, and mental grit. Whether you love them or hate them, burpees deliver results — especially when paired with intentional programming and clean nutrition.
4. Devils Press
How to Do the Devil’s Press: Full-Body Conditioning, Strength, and Fat Loss in One Brutal Movement
The Devil’s Press is a hybrid, high-intensity movement that combines elements of the burpee, dumbbell snatch, and shoulder press into one explosive, total-body exercise. It’s a staple in CrossFit and HIIT-style workouts due to its ability to spike your heart rate, torch calories, and build functional strength — all without needing a barbell or machines.
If you’re looking for a powerful conditioning movement that builds strength, endurance, and mental grit, the Devil’s Press delivers.
What Is the Devil’s Press?
The Devil’s Press is performed with a pair of dumbbells and combines the following movements into one continuous, fluid rep:
-
A burpee with hands on the dumbbells
-
A dumbbell swing/snatch from the floor to overhead
-
A press or lockout at the top of the movement
It’s a compound, multi-joint movement that challenges your entire body and builds serious work capacity.
How to Perform the Devil’s Press
Equipment Needed:
-
A pair of moderate-weight dumbbells
-
Open space (for safe overhead motion and foot movement)
Step-by-Step Instructions:
-
Start in a Standing Position
Hold a dumbbell in each hand at your sides. Stand tall with feet hip-width apart. -
Burpee to Dumbbells
Lower into a squat, place the dumbbells on the ground in front of you, and kick your feet back into a high plank position with hands gripping the dumbbells. -
Chest to Ground
Perform a chest-to-floor burpee by lowering your chest to the ground between the dumbbells. -
Jump Forward and Load
Jump your feet back up outside the dumbbells, keeping your back flat and hips low. -
Swing or Snatch Dumbbells Overhead
With a hip hinge, swing the dumbbells between your legs, then drive through your hips to bring them up and lock out overhead. You can also muscle snatch them if you have the control and mobility. -
Lockout and Reset
Once the dumbbells are overhead with arms fully extended and biceps by the ears, lower them under control back to your sides, and reset for the next rep.
Muscles Worked
-
Shoulders (deltoids)
-
Chest
-
Hamstrings and glutes
-
Quadriceps
-
Core
-
Triceps
-
Lats and upper back
-
Forearms and grip
Benefits of the Devil’s Press
1. Total-Body Conditioning
Every rep forces your legs, upper body, and core to work together. It’s a brutal yet effective movement for building endurance and functional capacity.
2. Calorie-Burning Efficiency
The Devil’s Press burns calories fast by keeping your heart rate elevated and using multiple large muscle groups with every rep.
“High-intensity, full-body movements significantly increase energy expenditure and post-exercise oxygen consumption, making them ideal for fat loss and metabolic training.”
— Kravitz et al., IDEA Health & Fitness Association
3. Improves Power and Hip Drive
The hip-hinge portion of the movement mimics a kettlebell swing, developing explosive power through the glutes and hamstrings.
4. Minimal Equipment, Maximum Output
You only need two dumbbells and some grit. No machines. No barbell. Just space, intention, and intensity.
Programming Tips
For Fat Loss / HIIT
-
3–4 sets of 10–12 reps
-
Use in a circuit with other bodyweight or dumbbell movements
-
EMOM: 8–10 reps every minute on the minute for 10–12 minutes
For Conditioning
-
5 rounds for time:
10 Devil’s Press
15 Goblet Squats
20 Sit-Ups
For Strength-Endurance
-
3–5 reps every 30 seconds x 10 rounds using heavier dumbbells
-
Focus on powerful hip extension and clean lockout
Common Mistakes to Avoid
-
Letting the dumbbells drift too far from your body
→ Keep them close to stay balanced and avoid back strain -
Rounding your back during the hinge
→ Set your lats, engage your core, and hinge from the hips, not the spine -
Lack of coordination between burpee and swing
→ Practice each component (burpee + snatch) separately if needed before combining -
Going too heavy too soon
→ Start with manageable weight to perfect form before increasing load or volume
The Devil’s Press is one of the most efficient dumbbell movements for combining cardio, strength, explosiveness, and grit. Whether you’re training for fat loss, improving athletic conditioning, or pushing your mental limits, this exercise will challenge you and deliver results.
5. Dumbbell Snatch
The dumbbell snatch is a slightly more complex resistance training exercise. It requires finesse, strength, and balance. Like the traditional barbell snatch, the dumbbell snatch recruits your lower body and upper body muscles, requires hip and wrist mobility, and actively recruits your core.
How to Do the Dumbbell Snatch: Power, Coordination, and Full-Body Strength in One Movement
The dumbbell snatch is a powerful, explosive, full-body movement that builds strength, coordination, stability, and conditioning. Used in functional fitness, CrossFit, and athletic performance programs, this unilateral lift targets your posterior chain while enhancing balance, speed, and neuromuscular control.
Because it uses a single dumbbell, it’s accessible, scalable, and highly effective for both beginners and advanced lifters — with the added benefit of improving core and shoulder stability through asymmetrical loading.
How to Perform the Dumbbell Snatch
Equipment Needed:
-
One dumbbell (moderate weight to start)
Step-by-Step Instructions:
-
Set Up Your Stance
Stand with your feet shoulder-width apart, dumbbell on the floor between your legs. Hinge at the hips with a flat back, knees bent, and grab the dumbbell with one hand. -
Engage Your Core and Lats
Brace your core and set your shoulders by pulling your shoulder blade down and back. -
Initiate the Pull
Drive through your heels, extend your hips, knees, and ankles in a powerful, fluid motion (known as triple extension), pulling the dumbbell straight up close to your body. -
Punch to Lockout
As the dumbbell reaches chest level, pull yourself under it slightly while punching overhead to complete the lift with your arm fully extended and the dumbbell directly overhead. -
Stand Tall and Reset
Pause briefly at the top, then lower the dumbbell back to the floor with control or cycle into the next rep. Switch arms every rep or after a set.
Muscles Worked
-
Primary: Glutes, hamstrings, quadriceps, deltoids, trapezius
-
Secondary: Core, calves, forearms, lats, rotator cuff
Benefits of the Dumbbell Snatch
1. Total-Body Power and Athleticism
The snatch trains explosive strength through triple extension, which transfers to sprinting, jumping, and other athletic movements.
“Exercises like the dumbbell snatch enhance power output and coordination by training explosive hip and knee extension.”
— Comfort et al., Journal of Strength and Conditioning Research
2. Unilateral Strength and Balance
Because the snatch is performed with one arm, it forces the body to resist rotation and stabilize through the core and shoulder, helping correct muscle imbalances and improve functional strength.
3. Improves Coordination and Mobility
The overhead component of the snatch helps improve shoulder mobility, scapular stability, and total-body coordination — especially when performed with speed and precision.
4. Elevated Caloric Burn and Conditioning
The dynamic, full-body nature of the dumbbell snatch increases heart rate quickly, making it ideal for metabolic conditioning workouts and fat loss programs.
Programming Recommendations
For Power Development
-
4–6 sets of 3–5 reps per arm
-
Rest 90–120 seconds between sets
-
Focus on form and explosive movement with moderate-to-heavy dumbbell
For Conditioning / Fat Loss
-
3–4 sets of 10–12 reps per arm
-
Use in circuits or HIIT-style workouts
-
EMOM (every minute on the minute): 8–10 reps per side
In a Circuit
-
10 Dumbbell Snatches (each arm)
-
15 Goblet Squats
-
20 Sit-Ups
-
Repeat for 4–5 rounds
Common Dumbbell Snatch Mistakes
-
Swinging the dumbbell out in front → Keep the dumbbell close to your body and “zip” it up vertically
-
Rounding your back during the pull → Engage your core and set your back before lifting
-
Muscling the weight up without hip drive → Use powerful hip extension, not just your arm
-
Poor shoulder lockout → Finish with your biceps by your ear and shoulder stabilized
The dumbbell snatch is one of the most effective movements for building explosive strength, improving coordination, and conditioning your entire body. Whether you’re training for performance, fat loss, or general fitness, this movement checks every box.
It’s fast. It’s powerful. And it work
6. Dumbbell Push Press
The push press uses the your entire body to move weight from the shoulder to overhead movement in a quick, effective motion. The push press uses the legs, core, and upper body which ends up driving the weight into the overhead position. While the push press movement does require the legs to bend, the completion of the movement has straight legs, straight arms, and the weight will be overhead in a full lockout position.
How to Do the Dumbbell Push Press: Build Power, Stability, and Overhead Strength
The dumbbell push press is a powerful compound movement that blends lower-body drive with overhead pressing strength. Unlike a strict shoulder press, the push press incorporates a slight dip and drive through the legs to help propel the dumbbells overhead, making it ideal for developing power, shoulder stability, and full-body coordination.
It’s a favorite among strength athletes, CrossFitters, and anyone looking to increase pressing strength, explosiveness, and metabolic efficiency.
How to Perform the Dumbbell Push Press
Equipment Needed:
-
A pair of dumbbells (moderate to heavy depending on experience level)
Step-by-Step Instructions:
-
Start Position
-
Stand with your feet hip to shoulder-width apart.
-
Hold a dumbbell in each hand at shoulder height, elbows slightly forward, and palms facing each other (neutral grip or slight rotation).
-
-
Dip
-
Initiate the movement with a small dip by bending your knees and hips slightly (about ¼ squat depth).
-
Keep your torso upright and heels grounded — this is not a full squat.
-
-
Drive and Press
-
Immediately extend your knees and hips to drive the dumbbells upward using leg momentum.
-
As the dumbbells rise, use your arms to press them overhead to full lockout.
-
Finish with the dumbbells directly above your shoulders, arms extended, and biceps next to your ears.
-
-
Lower with Control
-
Slowly lower the dumbbells back to shoulder height and reset before the next rep.
-
Muscles Worked
-
Primary: Deltoids (anterior and medial), triceps, quadriceps, glutes
-
Secondary: Core, hamstrings, upper traps, calves, serratus anterior
Benefits of the Dumbbell Push Press
1. Increased Overhead Power and Strength
By incorporating lower-body drive, the push press allows you to lift more weight overhead than a strict press, translating to greater power output.
“Push press variations produce higher force and power than strict presses due to the contribution of the lower body, making them ideal for developing explosive strength.”
— Lake et al., Journal of Strength and Conditioning Research
2. Full-Body Coordination
The push press improves neuromuscular coordination between the lower and upper body, building athletic movement patterns and efficiency under load.
3. Shoulder and Core Stability
Lifting asymmetrically loaded dumbbells requires more core engagement and shoulder control compared to a barbell, helping to correct imbalances and improve unilateral strength.
4. Metabolic Conditioning and Fat Loss
The explosive nature of the movement — paired with heavy dumbbells — spikes heart rate and burns a high number of calories, making it ideal for HIIT circuits or fat loss training.
Programming Tips
For Strength & Power
-
3–5 sets of 4–6 reps
-
Rest 90–120 seconds
-
Focus on heavy load and explosive drive
For Hypertrophy
-
3–4 sets of 8–10 reps
-
Controlled tempo on the way down
-
Pair with lateral raises or Arnold presses
For Conditioning
-
3 rounds for time:
12 Dumbbell Push Press
15 Kettlebell Swings
20 Mountain Climbers
Rest 1 minute between rounds
Common Mistakes to Avoid
-
Turning the dip into a squat
→ Keep it short and controlled — just enough to generate power. -
Pressing too early
→ Wait for full extension of the hips and knees before initiating the arm press. -
Lack of core bracing
→ Engage your abs and glutes to stabilize your spine and prevent arching. -
Letting dumbbells drift forward
→ Press in a straight line overhead, finishing with biceps next to ears.
The dumbbell push press is a dynamic, efficient way to build upper body strength, full-body power, and conditioning all at once. It trains movement patterns used in real life and sport while torching calories and building serious shoulder stability.
Whether you're chasing a stronger press, improved overhead mobility, or better workout efficiency — the push press is a must-have in your programming.
7. Dumbbell Clean And Jerk
How to Do the Dumbbell Clean and Jerk: Total-Body Strength, Power, and Conditioning
The dumbbell clean and jerk is a powerful, compound movement that develops explosiveness, coordination, overhead strength, and full-body athleticism. It mimics Olympic lifting patterns but is more accessible due to the use of dumbbells and reduced technical demand compared to a barbell.
By combining a clean (ground to shoulders) with a jerk (shoulders to overhead), this lift recruits nearly every major muscle group, making it ideal for building functional strength, improving conditioning, and burning serious calories.
How to Perform the Dumbbell Clean and Jerk
Equipment Needed:
-
One or two dumbbells (start light and increase as technique improves)
Step-by-Step Instructions (Single-Arm Dumbbell Clean and Jerk)
-
Start in a Hinge Position
-
Place a dumbbell between your feet on the floor.
-
Stand with feet shoulder-width apart, hinge at the hips, and grip the dumbbell with one hand.
-
Keep your back flat, chest up, and core engaged.
-
-
The Clean
-
Explosively extend your hips, knees, and ankles (triple extension) while pulling the dumbbell vertically close to your body.
-
As the dumbbell rises, pull yourself under and catch it at the shoulder in a front rack position with your elbow slightly in front.
-
-
The Jerk Dip
-
Dip slightly by bending your knees and hips (not a squat).
-
Keep your torso upright and brace your core.
-
-
The Jerk Drive and Catch
-
Explosively drive through your legs and press the dumbbell overhead, either with a push press or by dropping under it into a split or partial squat.
-
Lock out the arm overhead, with biceps next to the ear.
-
-
Stand and Reset
-
Fully stand to finish the lift with control, then either return the dumbbell to the floor or switch hands and repeat on the other side.
-
Optional: Double Dumbbell Clean and Jerk
-
Perform the same sequence using two dumbbells simultaneously.
-
Great for building bilateral coordination and power.
Muscles Worked
-
Lower Body: Glutes, hamstrings, quadriceps, calves
-
Upper Body: Shoulders, traps, triceps, biceps
-
Core: Abdominals, obliques, spinal stabilizers
-
Grip and forearms
Benefits of the Dumbbell Clean and Jerk
1. Develops Explosive Power
The clean and jerk utilizes triple extension (hips, knees, ankles), training your body to produce rapid force — a key element in sports performance.
“Triple extension exercises like the clean and jerk are foundational for developing athletic power and acceleration.”
— Comfort et al., Journal of Strength and Conditioning Research
2. Full-Body Strength and Coordination
This movement activates multiple joints and muscle groups, training the body as a system and reinforcing motor control, stability, and balance.
3. Enhances Overhead Stability and Shoulder Health
The jerk portion trains shoulder stability under load and overhead control, key for injury prevention and pressing performance.
4. Cardiovascular Conditioning and Caloric Burn
Because it’s high intensity and full-body, the dumbbell clean and jerk is extremely effective for metabolic conditioning, fat loss, and improving VO2 max when performed in high-rep sets or circuits.
Programming Tips
For Strength & Power
-
4–6 sets of 3–5 reps per side
-
Rest 90–120 seconds
-
Use heavier dumbbells, focus on explosive hips and clean catch position
For Conditioning / Fat Loss
-
3–4 sets of 10–12 reps per side
-
Include in circuits with minimal rest
-
EMOM (every minute on the minute): 5 reps per side for 10 minutes
In a Circuit:
-
8 Dumbbell Clean & Jerks (alternating)
-
12 Box Jumps
-
15 Kettlebell Swings
-
Repeat for 4–5 rounds
Common Mistakes to Avoid
-
Pulling with the arms too early
→ Focus on explosive hip drive first, then guide the dumbbell upward. -
Rounding the back
→ Keep your spine neutral and core tight throughout the movement. -
Pressing without leg drive
→ Use the legs to initiate the jerk — don’t turn it into a strict press. -
Letting the dumbbell drift away
→ Keep the weight close to your body during the pull and press.
The dumbbell clean and jerk is an elite total-body movement that improves explosiveness, overhead stability, coordination, and conditioning. Whether you’re training for performance, body composition, or time-efficient workouts, this lift delivers maximum return with minimal equipment.
8. Bench Press
How to Do the Barbell Bench Press: Build Chest Strength, Size, and Power
The barbell bench press is one of the most iconic and effective compound lifts for building upper-body strength and muscle mass. It primarily targets the chest (pectorals) but also engages the shoulders and triceps, making it a cornerstone of strength training programs for athletes, bodybuilders, and general fitness enthusiasts alike.
Whether your goal is size, strength, or improved pushing performance, mastering the bench press can elevate your training and your results.
How to Perform the Barbell Bench Press
Equipment Needed:
-
Barbell
-
Flat bench
-
Spotter (optional, but recommended when going heavy)
-
Power rack or bench station
Step-by-Step Instructions
-
Set Up on the Bench
-
Lie flat on the bench with your eyes directly under the bar.
-
Feet should be planted firmly on the floor, knees bent at 90 degrees.
-
Retract your shoulder blades and slightly arch your lower back to create stability and protect your shoulders.
-
-
Grip the Bar
-
Grip the bar just wider than shoulder-width apart.
-
Your wrists should be stacked directly above your elbows at the bottom of the lift.
-
-
Unrack the Bar
-
Take a deep breath, brace your core, and lift the bar out of the rack to bring it directly over your chest with straight arms.
-
-
Lower the Bar
-
Inhale and lower the bar slowly and under control to the mid to lower chest, keeping your elbows at about a 45-degree angle from your torso.
-
-
Press Back Up
-
Drive your feet into the floor, brace your core, and press the bar back to the starting position as you exhale.
-
Keep your elbows tucked, not flared, and wrists stacked over your elbows throughout the lift.
-
-
Reset and Repeat
-
Pause briefly at the top, rebrace, and repeat for your target number of reps.
-
Muscles Worked
-
Primary: Pectoralis major (chest)
-
Secondary: Triceps brachii, anterior deltoids (front shoulders), forearms
-
Stabilizers: Serratus anterior, core, lats, rhomboids
Benefits of the Barbell Bench Press
1. Builds Upper Body Strength
The bench press is one of the most effective lifts for developing pushing strength and power, which translates to improved performance in sports and daily life.
“Multi-joint, free-weight exercises such as the bench press are superior for building muscular strength and functional capacity.”
— Schoenfeld et al., Journal of Strength and Conditioning Research
2. Promotes Muscle Growth (Hypertrophy)
The bench press allows for progressive overload with heavier loads compared to dumbbells or machines, leading to greater mechanical tension and hypertrophy in the chest, shoulders, and triceps.
3. Improves Athletic Performance
A stronger bench press enhances pushing power, which is critical for athletes in contact sports, as well as for functional strength in pressing, throwing, and overhead tasks.
4. Scalable and Versatile
Whether you’re a beginner using light weights or an advanced lifter chasing PRs, the bench press is highly scalable and adaptable to various training goals.
Programming Tips
For Strength
-
4–6 sets of 3–6 reps
-
Load: 80–90% of 1-rep max (1RM)
-
Rest: 2–3 minutes between sets
For Hypertrophy
-
3–4 sets of 8–12 reps
-
Moderate load with controlled tempo
-
Rest: 60–90 seconds between sets
For Endurance or Fat Loss
-
2–3 sets of 12–15 reps
-
Lighter loads, supersets, or circuits
-
Combine with push-ups, rows, or sled pushes for upper body density
Common Bench Press Mistakes
-
Flaring the elbows out too wide
→ Increases stress on the shoulders. Keep elbows at a 45-degree angle. -
Bouncing the bar off the chest
→ Dangerous and eliminates muscle tension. Lower with control. -
Lifting feet off the ground
→ Reduces stability and power. Keep feet planted. -
Lack of scapular retraction
→ Causes shoulder strain. Always squeeze shoulder blades together. -
Not using full range of motion
→ Touch your chest (lightly) and lock out fully at the top.
The barbell bench press is a foundational upper-body lift that builds strength, size, and power through the chest, triceps, and shoulders. Whether you're training for a bigger bench, better muscle definition, or overall pushing capacity, mastering form and progression in this lift will help you get there faster and safer.
Need Help With Optimizing Your Diet And Nutrition Plan To Finally Get The Results You've Been Waiting For?
The Swole Kitchen is an exclusive membership opportunity for those who are looking to pursue a performance-driven lifestyle. By combining wellness consulting, nutritional lifestyle improvement, and 1:1 customized nutrition plans to our members, our programs aim to optimize human potential. In each of our programs, you’ll receive guidance to reclaim your health, fuel your lifestyle, and pursue performance ambitions, all while learning how to make nutritional decisions from a place of self-trust and intuition. All of our coaches are committed to providing the highest level of results-driven wellness to our members.

SWOLVERINE IS AN ENDURANCE ATHLETE AND ACTIVE LIFESTYLE BRAND. MADE FOR THE ELITE ATHLETE, AND THE STRONG-WILLED OUR PRODUCTS WERE DESIGNED TO FUEL YOUR ATHLETIC PERFORMANCE. WE PERFORM WHEN YOU PERFORM.
We believe that everyone can optimize not only their athletic performance but their human potential. The way we believe we can optimize performance is through transparency, clinically effective doses, and clinically proven ingredients with evidence-based outcomes. We provide the nutrients you need to power your active lifestyle.